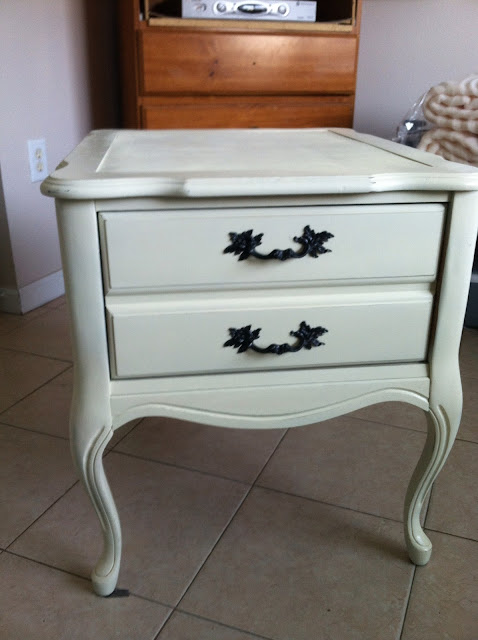
Now here is the (almost) after:
MUCH better right? Here's how I got there!
First off let me say that I've learned a lot about painting furniture from trial and error, and internet research, especially All Things Thrifty's awesome page on spray paint. But internet reading can only get you so far, sometimes you have to just dig in! First I started by removing the hardware, and giving the piece a good cleaning. Next, I sanded the entire piece with a medium-fine grit sanding block.
It's not necessary to sand all the finish off. Just rough it up a bit so the primer with adhere, and then make sure you wipe down again using a clean rag or tack cloth (sold in Walmart or Home Depot- works great!)
Next comes the primer! I used white primer because I was using a light colored paint, for a darker color you could use gray primer for better coverage. I applied 3-4 very light coats of primer, letting dry for about 10 mins between coats and sanding lightly between each coat to ensure a smooth surface for the paint to adhere to. This is after two coats of primer:
Now the fun part: PAINT! I used Krylon "Ivory". The color is a creamy white with just a hint of yellow, perfect because I was going for an antiqued look. I applied 3-4 light coats, also sanding in between coats with a very fine grit sandpaper. Here she is after painting:
I also painted the hardware in Rustoleum's "Oil rubbed Bronze" and reattached, since it was in good condition and I liked the vintage look.
Before:
After:
But I'm not finished yet! I said I wanted an antique look, so I decided to distress the piece just a bit. I was very nervous about scratching up what I just worked so hard to paint, but once I got going, the more I distressed the more I liked it! Here some up close shots of the distressing:
You'll notice that the top looks a little strange. There was a leather panel embedded in the top, which I actually thought was cool, but it was pretty beat up.
Poor leather :(
So while I did paint over it, part two will be about fixing that little problem. I'll give you a sneak peak, it involves this gorgeous fabric from Jo Ann's.
Stay tuned for part two!
Update: Click for for the second part!


Woah! I'm really loving the template/theme of this site.
ReplyDeleteIt's simple, yet effective. A lot of times it's difficult to get that "perfect balance" between
usability and appearance. I must say you've done a superb job with this.
In addition, the blog loads extremely qujick
for me on Firefox. Superb Blog!
Feel free to surf to my web blog black dresses for weddings